Setup process for summary invoice - Xero Bridge app
With the Summary entry to Xero option, our app will sync a summary invoice based on each Shopify payout received by your business. The frequency of Shopify payout depends on the payout frequency selected with Shopify.
For all other payment methods than the Shopify payment method, our app will create one invoice per payment method per day whenever there is any activity for the said payment method on that day. Our app will sync daily invoices for other payment methods based on the 12 AM midnight cut-off.
This article provides information related to the setup process of the Xero Bridge app when the “Summary Entry to Xero” option is selected.
After installing our app, connecting it to Xero and option “Summary Entry to Xero” is selected, it will land you to the app settings page of our app. These settings are very important and will be used by the app to sync all of your orders and related information from Shopify to Xero.
This is the first tab of our app settings.
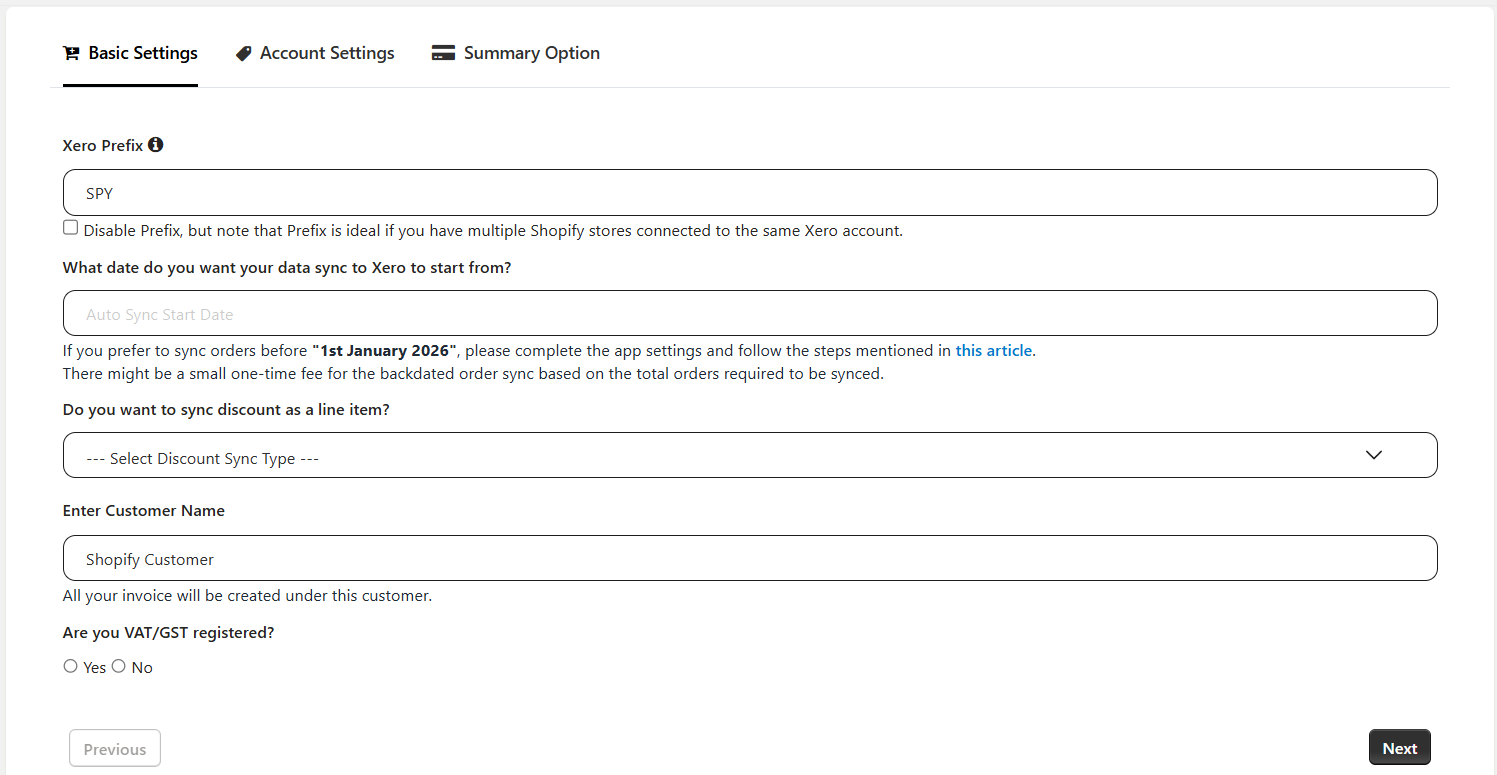
Tab 1 – Basic Settings
1. Xero Prefix:
This is a prefix that will be put before the Summary invoice reference number. For example, if you select the ‘SPY’ prefix then a summary of PayPal from 5th November 2022 will be synced as SPY_PAYPAL_20221105. The summary of the Shopify payment method will be synced as invoice number "SPY_94497603807" where the number after SPY_ is the payout ID from Shopify.
You also have an option to disable this prefix with the check box below but we suggest you use the prefix.
2. Date of Sync start:
This is the date from when you want summary information to sync. Most often, it is either today, the beginning of the current month, or the beginning of the current financial year.
By default our app allows you to select the auto-sync start date back to the past 2 months. If you want to sync summaries beyond the allowed date then you can request the backdated summaries sync from the dashboard of our app by clicking on "Backdated Order Sync Request". Before syncing the backdated summaries, we advise you to complete our app settings and sync one batch of summary, and verify in Xero. If you are satisfied with the summary sync then request for the backdated summaries.
3. Discount Sync as a Line Item
By default, summaries are generated with the discount already deducted. To sync the discount as a separate line item, select “Yes” from this drop-down.
4. Enter Customer
By default, all summaries will be created with the customer name "Shopify Customer" as this is the default customer selected in this field. If there is a need to sync the summaries with any other customer then you can enter that customer name in this field. All summaries will be synced with the name of the customer entered here. If you want to select a customer that is not already created in Xero then you can enter the name of the customer and save it.
Tax Settings:
Are you VAT/GST registered?
You can check this box if your business is VAT/GST registered. Once the check box is ticked, the options will be available to configure the taxes.
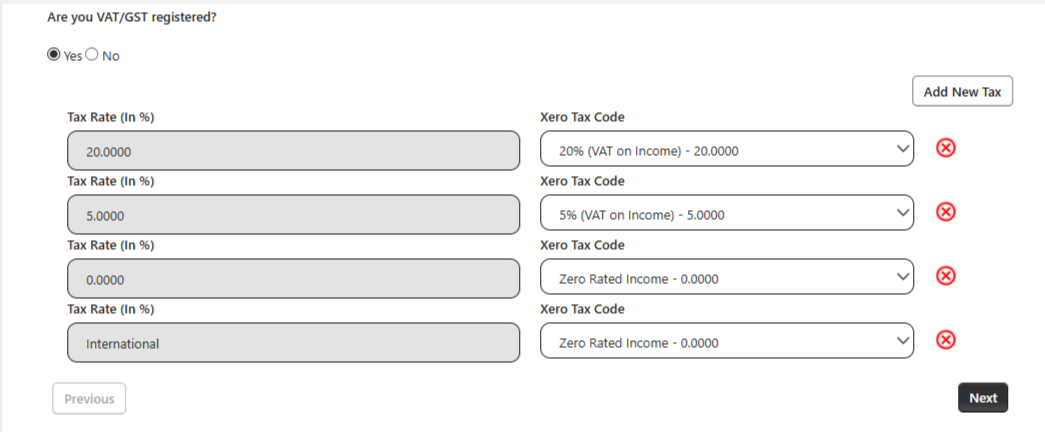
By default, the tax rates will be automatically selected as per the country. Select the Xero tax code against the tax rate and click on the “Next” button. If there are more taxes that need to be configured then click on “Add New Tax” so the option will be available to configure more tax.
The tax codes selected here will be applicable for each transaction type listed on the 2nd tab of our app and will be applied to the summary sync.
For example, you have 10 Shopify orders included in a payout and 6 orders with a total amount of $800 were applied tax, and 4 orders with a total amount of $200 without tax so when the summary is synced, it will show $800 amount with tax code selected here and $200 with no tax with relevant tax code.
In the same way, the tax codes will be applied to other transaction types listed on the 2nd tab. When the relevant tax is applied in the Shopify order for any transaction type, our app will apply the relevant tax for that transaction type while syncing the summary.
Tab 2 – Accounts Settings
On this tab, you will see the transaction types and default accounts selected by our app. The default accounts will be created in Xero when you save the settings. Optional accounts for other transactions are listed below the mandatory accounts. When a transaction of that type is received, the app will automatically create the corresponding account. If you want to sync the amount of any transaction type to any account other than the default account selected here then you can update the account from the drop-down list.
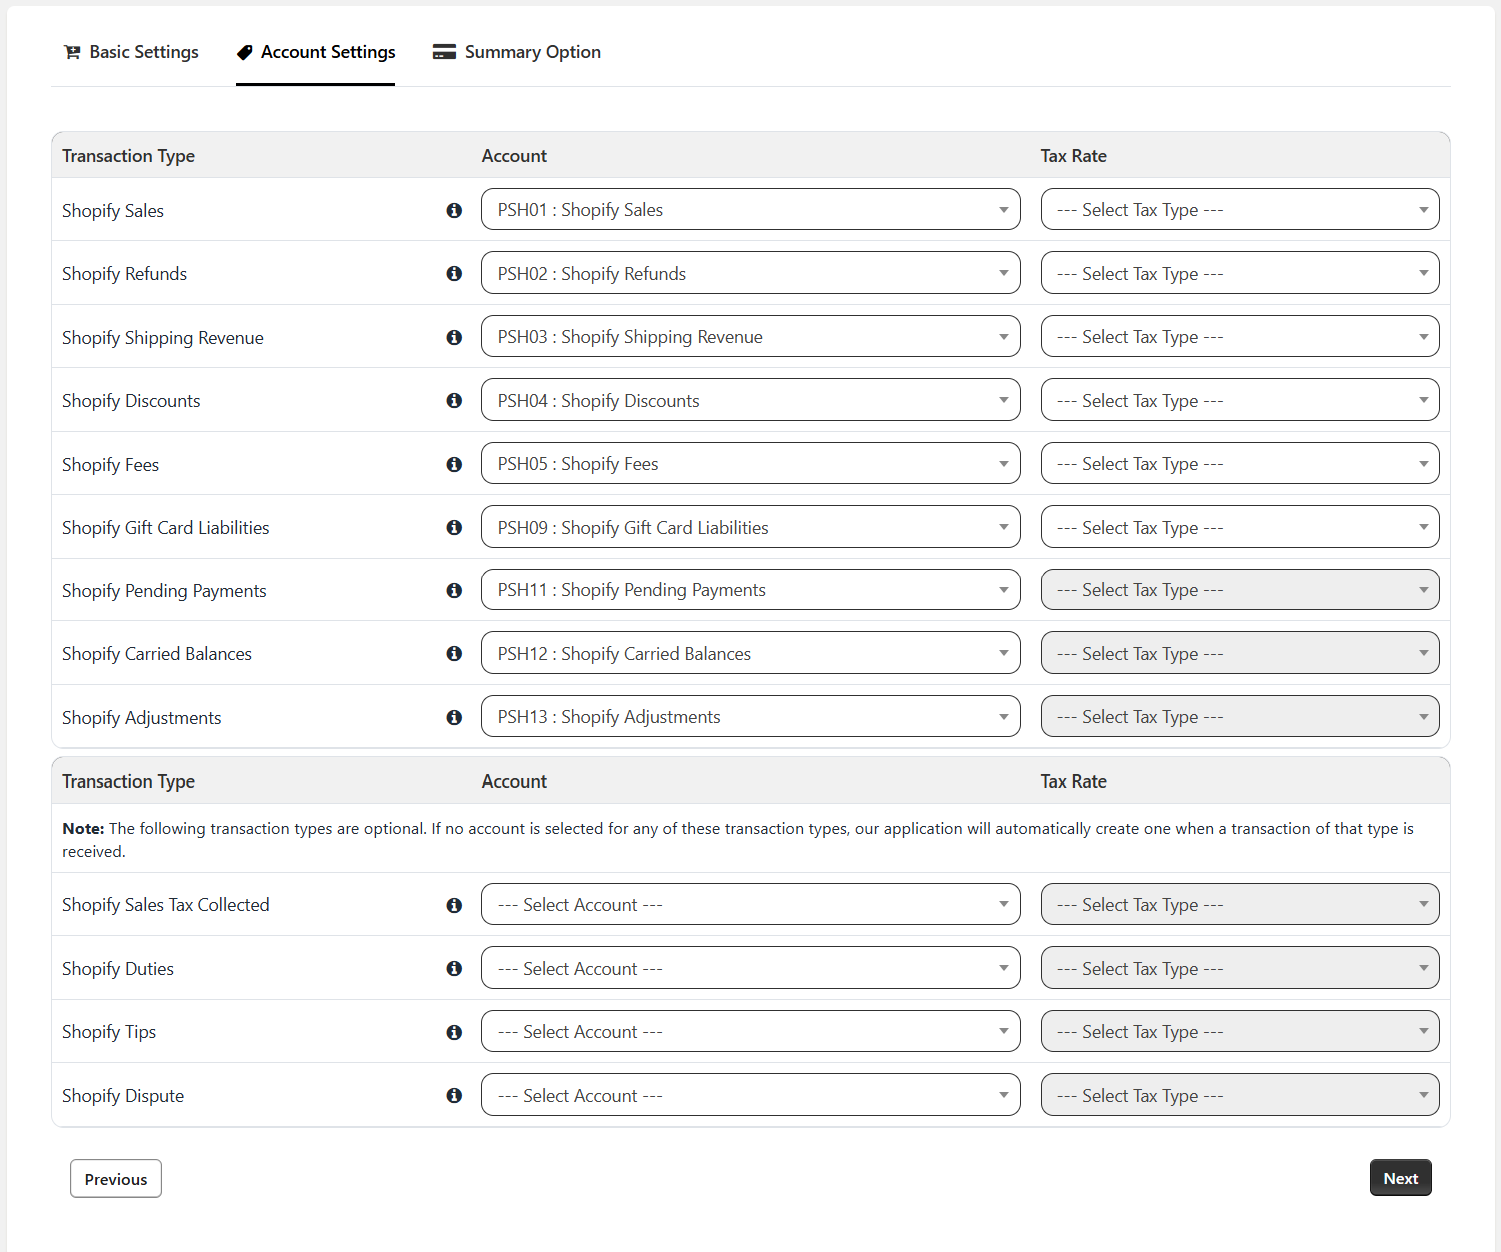
Below is a brief description of each of the Transaction types mentioned on the 2nd tab.
Shopify Sales: All Shopify product sales will be recorded under the account selected here.
Shopify Refunds: The refunds created in Shopify will be recorded under the account selected here.
Shopify Shipping Revenue: The Shipping revenues will be synced to the account selected here.
Shopify Fees: Our app only receives the fees data for Shopify and PayPal payment methods. The fees will be synced to this account.
Shopify Gift Card Liabilities: In case you offer Gift cards to your customers, the liabilities for the gift cards or use of gift cards are accounted for in this account.
Shopify Pending Payments:
i) If the order is partially paid then the entire sales amount will be included in the summary. However, the balance payment which is still due from the customer will appear as a pending payment with a negative amount in the summary invoice. The pending payments will be synced to this account.
When the payment is received at a later date, the amount will show up in the pending payments line as a positive amount in the summary invoice which ultimately nullifies the pending payment.
ii) If the order is edited in Shopify by removing a line item and the remaining amount is paid then the amount of the removed item will be recorded as pending payment. For example, an invoice created with an amount $100 and later an item worth $20 was removed by editing the order and $80 was paid then $20 will be considered as pending payment.
Shopify Carried Balances: If a particular payout is spread over multiple months, our app will split the sales/expenses into different months. Any amount that has to be carried forward to the other month will be accounted for in this account. This amount will usually be nullified immediately. If at all this is required, it will happen only for payouts using the Shopify Payments method.
Shopify Adjustments: If there are any mismatches or any other amounts missing in the information and there is a need to make an adjustment to match the invoice with the payout amount, the adjustment will be done in this account so that it can alert you. If at all this is required, it will happen only for payouts using the Shopify Payments method.
Shopify Sales Tax Collected: If you collect any Sales Tax or other similar tax from your customers, the tax will be synced to this account. For UK-based merchants, the VAT collected from UK customers will be entered in the same line item as the sales/refund. Likewise, for Australian merchants, the GST collected from domestic customers will be entered in the same line item as the sales/refund.
Shopify Duties: If you are collecting duties in Shopify then you can select the account here to sync it to Xero. This is usually applicable to UK merchants selling to Europe.
Shopify Tips: Tips received from customers in Shopify orders will be synced to this account.
Shopify Dispute: Any charge dispute raised by customers and stopped by Shopify or released on winning the dispute will be synced to this account.
*The lines for sales, refund & shipping may be classified into separate lines if you have orders with multiple tax rates.
Once you are satisfied with the accounts, please click on the Next button located at the bottom right corner of the 2nd tab.
Tab 3 – Summary Option
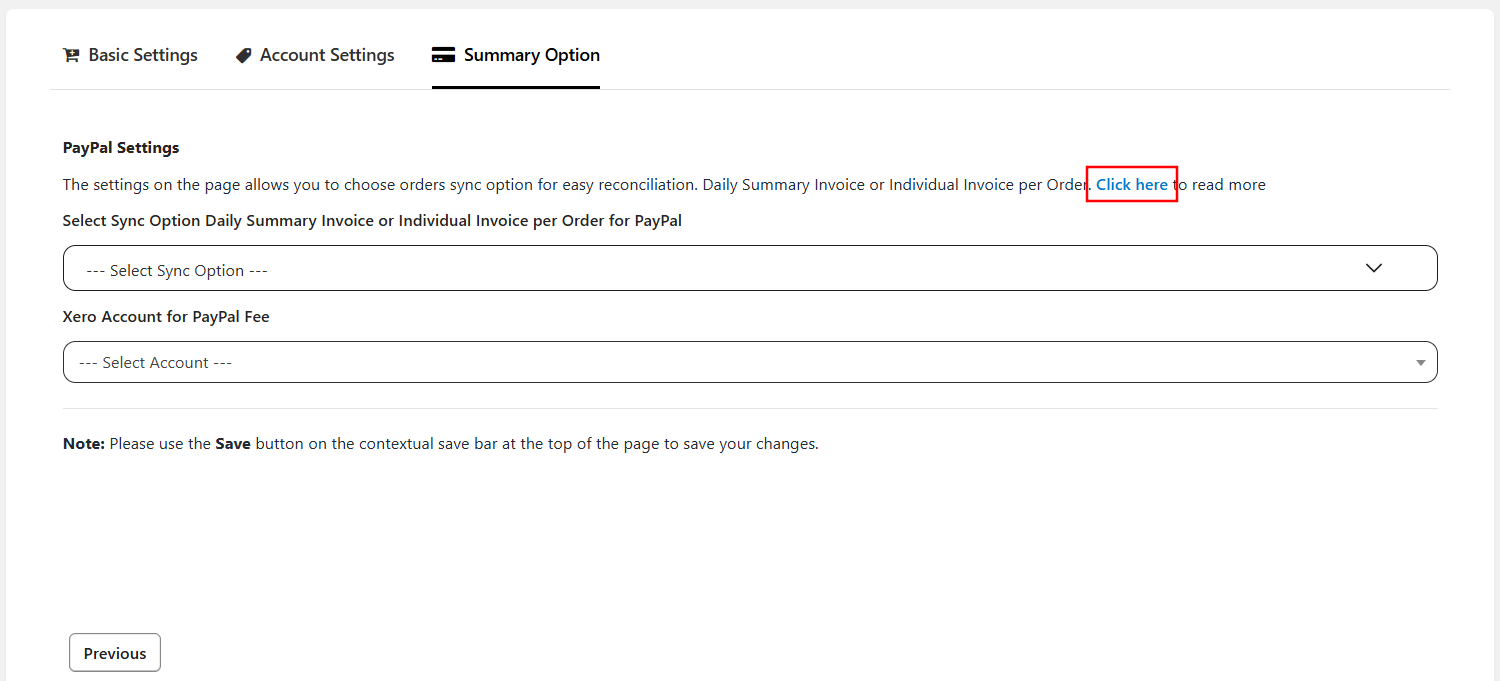
On the 3rd tab of our app settings, there will be the options available from the drop-down list whether you want to sync daily summary invoices for PayPal OR Individual PayPal orders. For details on both these options, you can click on the 'Click here' button as highlighted in the above screenshot. Alternatively, you can click on the below link.
After completing the settings, click on the “Save” button located on contextual save bar at the top of the page.
Once the settings are completed, "Fetch Data from Shopify" button is automatically clicked to initiate the data fetch process. Please note that it might take several minutes to finish this process for the first time.
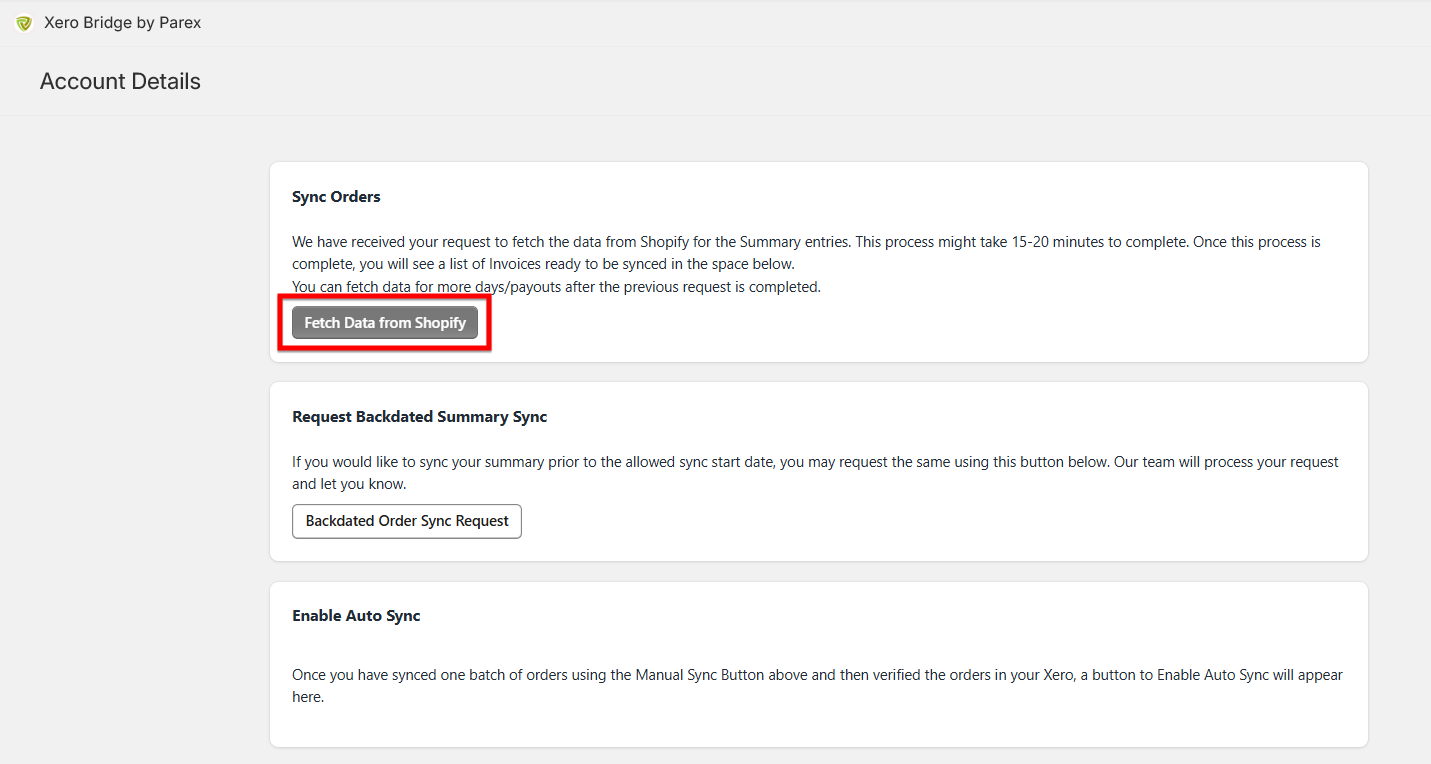
Once this process is completed, you will see a list of Invoices ready to be synced as shown in the below screenshot. You can review the summaries and send them to Xero.

We suggest you to sync some summaries and verify them in Xero. If you are satisfied with the data synced then you can enable the auto-sync so summaries will sync automatically to Xero.
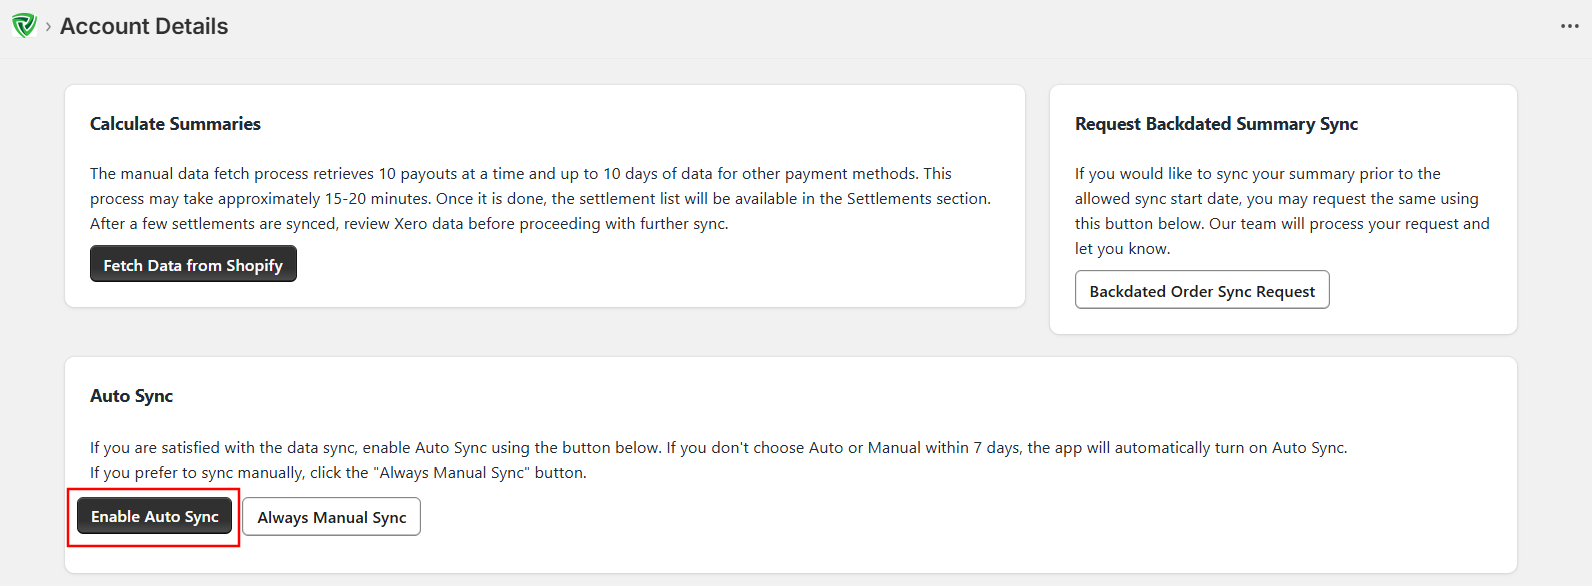
Enable auto sync option will be available only after at least one summary is synced. When the auto sync is enabled, the summaries of all payment methods will be synced twice a day.
If you select the manual sync then it will process 10 Shopify payouts and their summaries at a time and 10 days’ summaries for other payment methods.